> For the complete documentation index, see [llms.txt](https://docs.goaffpro.com/llms.txt). Markdown versions of documentation pages are available by appending `.md` to page URLs; this page is available as [Markdown](https://docs.goaffpro.com/program-settings/extra-settings/create-legal-documents/add-custom-fields-to-legal-document.md).

# Add Custom Fields to Legal Document

**GoAffPro** provides you with the option to add custom fields to the legal document.

To add custom fields to the legal document, go to the **Extras** section in the **Settings** tab of the GoAffPro admin panel.&#x20;

<figure><img src="/files/uHXvzqvZzgMsVhlVMO3f" alt=""><figcaption><p>Settings > Extras</p></figcaption></figure>

Here, go to the Legal Documents section.

<figure><img src="/files/6ssufXQ9jNRAYUg9wUdA" alt=""><figcaption><p>Legal Documents</p></figcaption></figure>

Now, click on **New Document**.

<figure><img src="/files/C003xLH5B3yLneaFnZHA" alt=""><figcaption><p>Click on New Document</p></figcaption></figure>

This will open up the New Document section.

<figure><img src="/files/qeZ1PKBFgwdp6NlKW8Jz" alt=""><figcaption><p>New Document</p></figcaption></figure>

Here, set the title and content for the document.&#x20;

<figure><img src="/files/Qq64GKb6oqWv53UI9mAv" alt=""><figcaption><p>Set the title &#x26; content for the document</p></figcaption></figure>

Next, click on **Add custom field**.&#x20;

<figure><img src="/files/MiDflG97DDA6NorS5vXK" alt=""><figcaption><p>Click on Add custom field</p></figcaption></figure>

Here, set the field ID.

{% hint style="info" %}
The field ID should ideally be a single word set in lowercase. It should not include special characters or spaces.&#x20;
{% endhint %}

<figure><img src="/files/zGWFmSbHKBHAc2Wlcz3r" alt=""><figcaption><p>Set the field ID</p></figcaption></figure>

Now, set the label.

<figure><img src="/files/tLwbtsJCQ83t5ifXdQJW" alt=""><figcaption><p>Set the label</p></figcaption></figure>

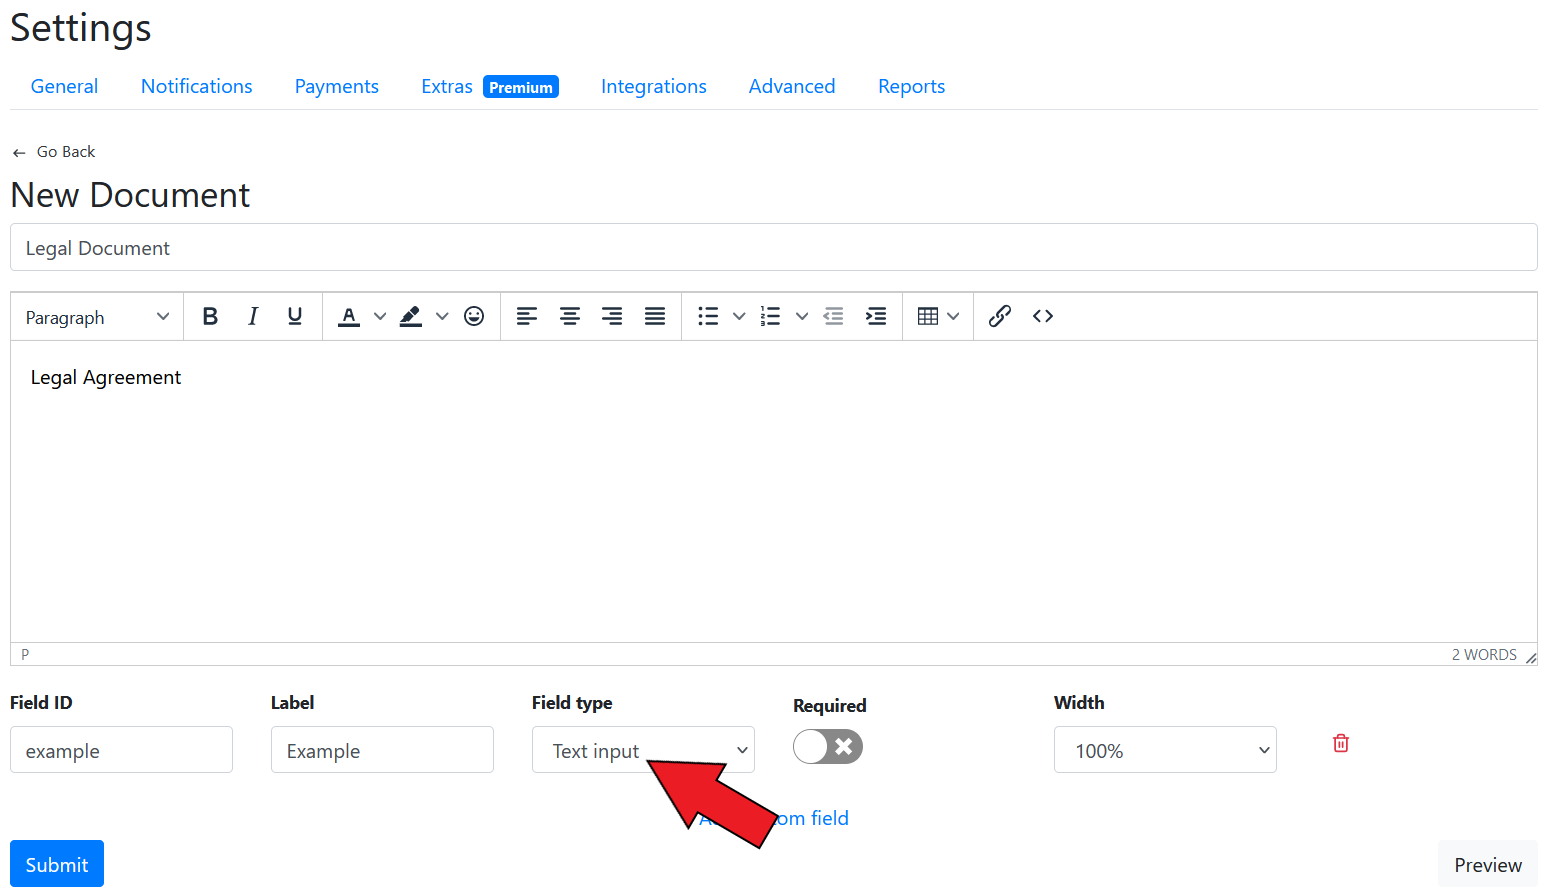
Next, select the field type.&#x20;

{% hint style="info" %}
You can set the field type as text input, phone number, text area, or signature.
{% endhint %}

<figure><img src="/files/X1ALgFQG2MMlRTZS8oJT" alt=""><figcaption><p>Select the field type</p></figcaption></figure>

There are also options to set the field as required and adjust the field width.

<figure><img src="/files/25VNyIdbbPWEZjzg3Eyg" alt=""><figcaption><p>Set the field as required &#x26; adjust the field width</p></figcaption></figure>

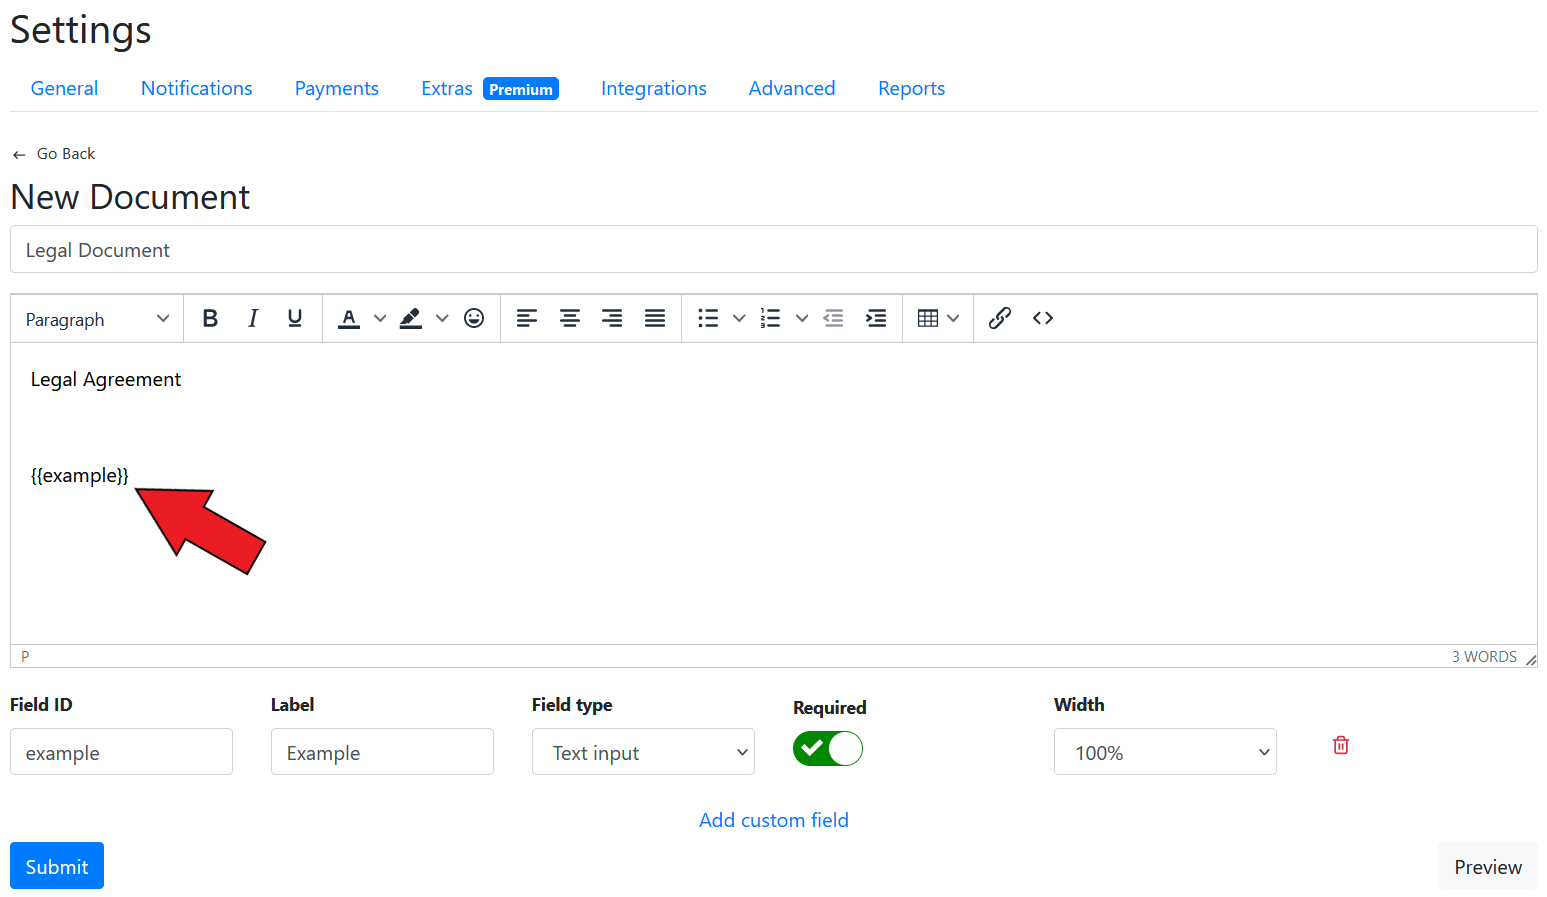
After this, add the placeholder **{{id}}** to set the field's value in the legal document.&#x20;

{% hint style="info" %}
**For example**: If you set the field ID as: address, the id for it would be: {{address}}

Also, for signature fields, you will need to use the **{{{id}}}** (with three curly brackets).
{% endhint %}

<figure><img src="/files/EsRHrubSZ6lWdl0f9HQO" alt=""><figcaption><p>Add placeholder {{id}} to set the field's value in the document</p></figcaption></figure>

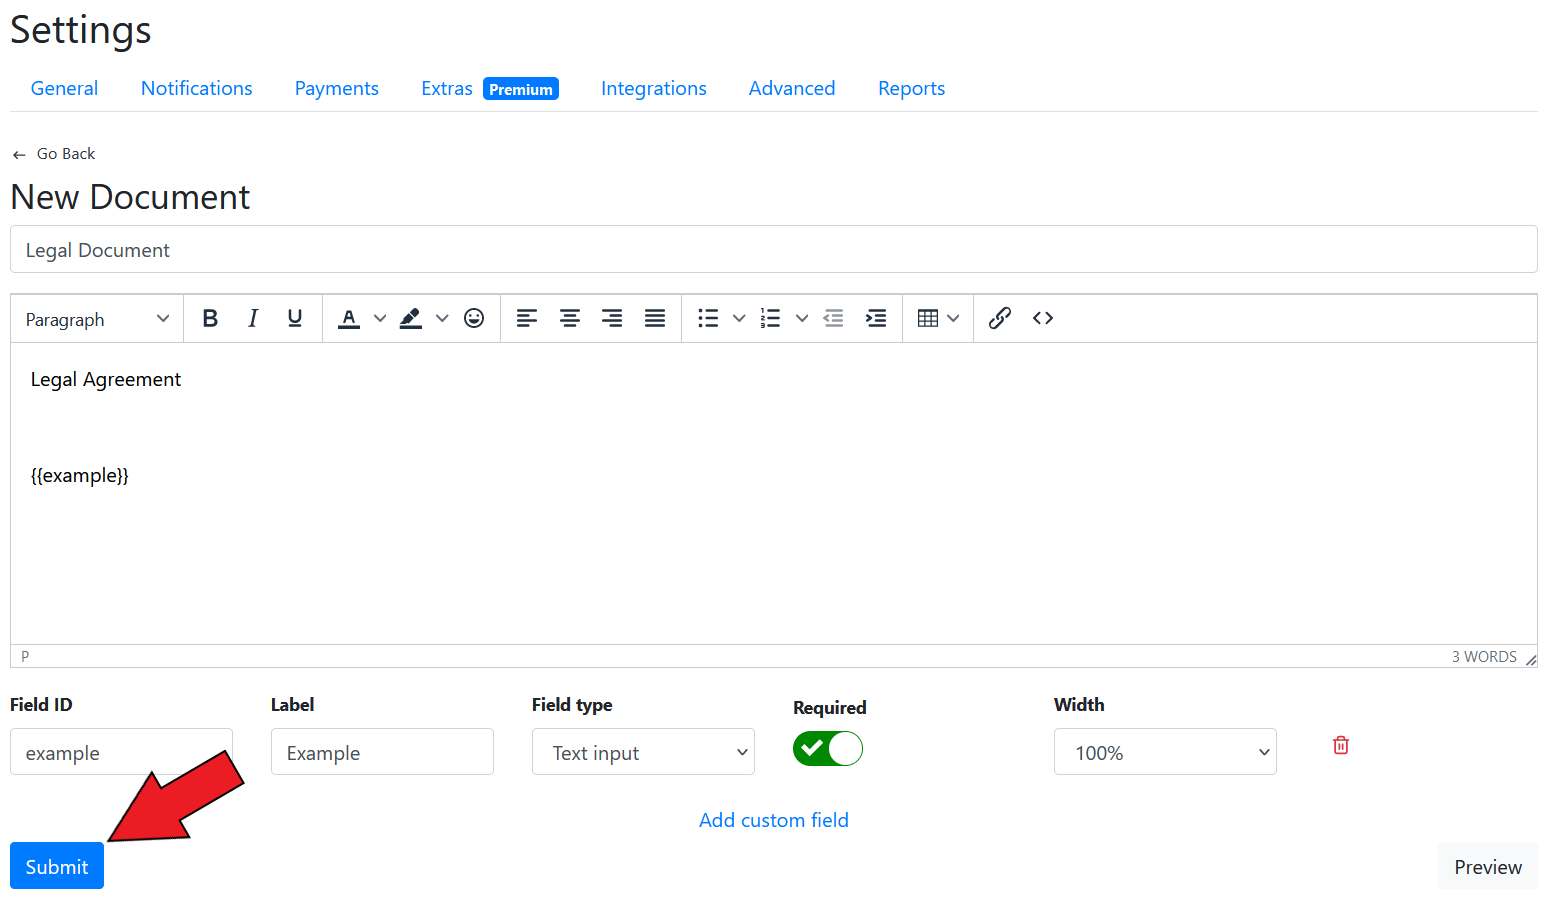
Finally, click on **Submit**.

<figure><img src="/files/J4GxjTqSQDTVUklvniNZ" alt=""><figcaption><p>Click on Submit</p></figcaption></figure>

The legal document will get saved.&#x20;

<figure><img src="/files/LzrBBFbpgeMQFJpZm5hv" alt=""><figcaption></figcaption></figure>

{% embed url="<https://www.youtube.com/watch?v=24sAXUWqMXs>" %}
Add Custom Fields to Legal Document
{% endembed %}